Having an online presence is no longer an option but a necessity. Your website is your brand and identity online.
Whether you run a full-fledged business or work as an individual contractor, or just need to design websites as a part of your job, knowing how to design a website, and a good one at that is crucial.
It may sound like an uphill task, but once you have understood how to begin the process of web design and what tools you will need to be equipped with, the work gets streamlined.
What is most important in your website design efforts, is having a well-thought-out strategy. Like all other processes in a business, website designing too requires a little planning to ensure that you have a roadmap to follow.
You don’t have to be a tech genius to build a good website. With all the tools and services at your disposal, anyone can learn how to create a website from scratch.
Here we share a step-by-step guide that will help you plan and build your website with minimum effort.
1. Define Your Site’s Purpose and Strategy
The first thing you need when thinking of designing a website is to define why you need the website in the first place. What purpose is the website going to serve for you? Your website has to be a unique identifier of your brand, so it must be designed in line with your business needs.
You need to decide what content you are going to publish on your website. Whether it will be an online shop or an information center for your customers or is it going to be a news site.
There are broadly three strategic options that you can choose from – sell products or services, generate leads, and establish business credentials. These will include online stores, portfolio sites, blogs, landing pages, resume sites, event sites, and more, each having a different objective.
The purpose of your site will influence your website design as well. What functions you need to incorporate into the website will be decided based on its purpose.
Accordingly, you will also need to have an appropriate content strategy that defines what kind of content you will be putting up on the site.
2. Choose Your Website Platform
Once the goal for your website is set, you need to decide which platform you’re going to use for developing your website. There are many platforms online that you can choose from.
One of the most popular choices is WordPress. Almost 20% of self-hosted websites globally are using WordPress, which is huge for a single platform.
WordPress gives you so many design options that you could be looking at 10 completely different websites with extremely different designs and elements and they could all be built on WordPress.
You can create flawless and unique website designs with WordPress but before you start, you need to choose a hosting plan.
You will also need to purchase and upload your theme before you start building your website. Let us look at the steps involved in WordPress website design. This will help you understand the process better.
- Name your website
This is probably the easiest and also the most critical part of the process. Picking a name for your website is easy but you also need to remember that this is the name people will relate your brand with. So, make your choice wisely.
- Buy a domain and hosting
There are several companies that can register a new domain name for you. Some of the most popular companies include BlueHost, DreamHost, GoDaddy, Hostinger, and more. Let us take the example of BlueHost for now.
BlueHost is a hosting site optimized for WordPress. It is quite affordable and is beginner-friendly so you wouldn’t find it too overwhelming.
So, you go to the BlueHost site and pick a hosting plan that suits you. You can choose between three different plans – Basic, Plus, and Choice Plus. If you are just starting out, the Basic plan is good enough.
The next step is entering the domain name you have picked for your website. BlueHost also gives you a free domain name for 1 year, if you need one. You can then enter your personal details, make the payment and complete the purchase.
- Install WordPress
You can install WordPress manually or you use BlueHost for this. Once you have signed up on BlueHost, you can log in to your customer profile. BlueHost will provide you with an easy-to-use wizard for installing WordPress.
You can also go to the “My Sites” tab and provide the domain name for your new site and the username or password you will be using on WordPress, and when your wizard is done with the installation, your site is ready to be customized.
- Set permalinks on WordPress
A permalink decides how your URLs are structured within your site. The most common and convenient structure is one that has the site’s name in it along with the page title.
For example, the pricing page on a SaaS website can have the URL as “XYZ.com/pricing”.
To select the permalink on WordPress, go to Settings and then to Permalinks and choose the style you need.
- Make your WordPress website public
For your website to be visible to all and appear in search, you will need Google to find and index the site. For this, you must go to the Settings on WordPress again, then go to Reading and deselect the box against “Discourage search engines from indexing this site”.
- Set title and tagline
The next step is to set your WordPress website’s title and tagline. For this, go to the Settings and on the fields marked Set Title and tagline, enter the title and tagline you want to use.
Depending on the theme you choose, the title and tagline can appear in multiple places throughout your website. It will also be in the SEO description that is used by Google when listing your site in search results.
The tagline however is not mandatory and can be left blank if you don’t need one.
- Allow or disable comments, pingbacks, etc.
To allow or restrict users from commenting on new posts, pingbacks, etc. you can go to Settings and then to Discussions and tick or untick the appropriate boxes to make the changes.
- Set your time zone
Setting your time zone makes the publishing of your new posts and pages more meaningful or predictable. You can set the time zone to where you are located or where your target audience is, whichever serves the purpose better.
- Purchase a theme
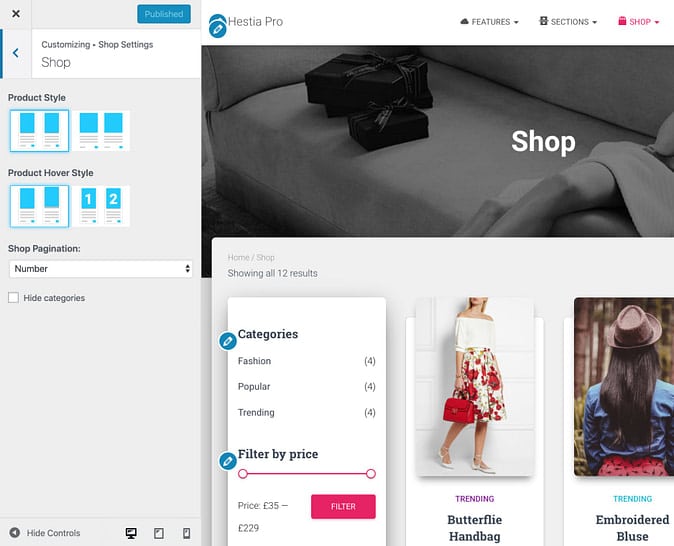
The next thing to do is getting a WordPress theme for your site. There are a few free and paid options on WordPress itself, but if you want a wider range to choose from you will need to go to an online marketplace like ThemeForest or an independent theme store like ThemeIsle.
You can purchase the theme of your choice from these sites and download the zip file to WordPress. Once added to the WordPress library, the theme can be easily installed by going to Appearance → Themes, select the theme, and click on Install. And to enable it on your site, you need to just click on the Activate button that appears.
- Install plugins
Another very important thing that will help you manage your site, later on, is the plugins you use. Whether you want analytics associated with your site, want to create an online store, or need to easily change your website design, a plugin is essential.
So, carefully choose from the thousands of WordPress plugins available and install them at this stage.
With this, the basics of your website design are almost done. You now need to fine-tune things a little to make it more functional and more appealing as well.
3. Research the Latest Web Design Trends
Although your web design choices will be influenced more by your personal preferences, yet it is advisable to keep track of the latest web design trends to ensure your website isn’t missing out on anything.
Take a look at what your competitors are doing. This will tell you what the latest trends in your industry are and you can then decide whether to follow that trend or set a new one.
Trends could include anything from the colors used on other competing sites to the fonts to the kind of interactions that brands have with their customers and much more.
4. Decide on Your Branding
Branding is extremely important when it comes to website design. Your website is the representation of your brand online and so it has to be consistent with your overall branding.
Everything from your logo, fonts, color scheme to the imagery you use should be in line with your branding strategy.
The color scheme you use, for example, should instantly remind a visitor of your business. It should have some relevance to your business’s image.
For instance, if you are selling potted plants online, your website’s color scheme should ideally contain shades of green so that visitors can relate your business to the site.
Each color in the spectrum represents certain traits, such as pink represents something feminine or girly, red represents energy or vibrancy, yellow reflects optimism and cheerfulness. So, using colors aptly is important.
Apart from this, your logo and fonts should be consistent with what you use on other platforms. Using custom-made images, at the right places on the site can also work well for your branding.
5. Create Your Site Map
The next thing your site needs is a site map. The site map determines how many pages you need to create. The site map gives you a clear picture of what your website will cover.
Building a website without a site map can be very difficult because you don’t have an idea of what the scope of your website should be.
An ideal site map usually has the following pages:
- Home page
- About page
- Product or service pages
- Blog
- Contact page
Some websites may also need the following
- Resources
- Pricing
- Offers etc.
Each business has unique functions and needs and so your site map must cover all the important aspects of the business.
Creating a flow chart that shows what pages are to be included and wherein the site’s navigation these pages should be will make things much easier to visualize.
6. Create Web Page Design
The next important step is to create a unique design for your site taking into account all the elements we have discussed so far. Now there are easily available themes and templates online that most beginners prefer to use.
But one thing to remember here is that a template will never give your site the unique experience as a customized UI or UX design.
For this, you will need the help of experienced graphic designers and UI/UX designers or some really good design tools. The design should clearly define how each page on your website will look, where the content should be placed on a page, where to place your CTA buttons and opt-in forms, and more.
If you plan to design the web pages yourself, you can start with a rough sketch of how you want the page to look. Based on this initial sketch, you can create a mock-up of the site and if this looks good, you can go ahead and build a prototype to test if the web page is working as expected.
7. Write Your Website Copy
Another very important aspect of your website is the website copy. Your website should not only be engaging and capable of drawing more visitors to your site, but it should also help the site appear in search. Ideally, the website copy should be short and succinct.
Longer content is meant for other platforms like blogs. The copy should be directed at the audience persona that you are targeting.
Important words and phrases as well as CTAs should be in bold or at least clearly visible. The website copy should also be optimized for search by using the right keywords and structuring the content properly.
No time to write a website copy of your own? Sisu Digital offers copywriting service depending on your needs like website copy, ad copy, blogs, etc.
8. Build Your Web Pages
When your web page design, graphics, and copy are ready, it’s time to build the page. On WordPress this process can be easy or slightly complex, depending on the theme you have chosen.
Some themes come with easy web page builders but some themes require a little manual effort.
To make the process easier on WordPress, you can try some page builder plugins such as Elementor page builder that comes with a host of features that make the execution of your design much faster.
9. Add Interactive Experiences & CTA
You have some goals for your website, be it generating more leads or driving sales. Whatever be the goal, you will need to urge visitors to take an action on your site. That is why your site needs a Call to Action.
Adding a contact form on one side of your landing page or a pop-up appearing at the right time in the visitor’s journey can do the trick here.
However, it is important not to spam your visitors with pop-ups and CTAs. Keep them subtle and well-timed so that the site does not come across as too salesy.
You can also add some interactive experiences to your site. Such as a free interactive tool, a calculator of some kind, or a spinning wheel for offers if you’re building an e-commerce site.
10. Launch Your Website
When all of this is done, your website design is ready and you can launch your website. Publish your site and promote it on other platforms. Share the link to your social media pages.
Get in touch with influencers in your niche to collaborate and promote your site. If you have an email list, create an email campaign to promote the site.
Market the website in every way possible. A good digital marketing strategy can come in really handy at this point.
11. Optimize, Analyze and Improve
Once your site is up and running, you can now measure its performance in real-time. It is important to monitor and track the site’s performance to ensure that it meets the established goals. If you already have analytics built into your site, you can easily keep track of the performance.
You can also use Google Analytics to measure and track certain things like the number of page views you get, the number of time users spends on a page, conversion rate, bounce rate, and more.
These metrics help you identify issues with your website and understand what is lacking. They can also help you improve your site’s SEO to make it rank better in search results. Analytics will also tell you how your site stands against the competition.
Conclusion
No matter what kind of a website you’re building, these steps are common to all types of web design. If followed correctly and executed well, this step-by-step guide can help you create engaging and aesthetic websites in no time.
Even if your site is already live, remember that a website is never really complete. It has to evolve and change with time and this manual can come in handy when you need to revamp your site as well.
Do you need a website for your new-found business or does your website need an upgrade? Sisu Digital offers web design services for landing pages, one-page websites, and multiple-page websites.
Not seeing what’s right for your company? We also develop websites customized to your business needs.


