Email marketing becomes one of the productive tools to grow your business.
It’s free, personal, and instant.
Nowadays, more and more people use emails.
So, there is no reason for us not to conduct email marketing. However, performing it successfully is another story. We need to prepare it carefully.
Email marketing has 2 types: cold and warm email. In this blog, we only concentrate on the cold email campaign. And if you’re struggling or wanting to learn about a cold email campaign, you come to the right place where to find your answer thoroughly.
1. What is a cold email? The difference between cold email and warm email
Cold email means you send an email to a recipient that you haven’t had any prior contacts before. A warm email has the contrast meaning; it means you send an email to a person that you have outreached.
In this blog, we will show you a step-by-step guide from preparing to sending and keeping track of your email list.
2. Steps for setting up a cold email campaign
2.1. Collect email list
To run a cold email campaign, we need to have a list of contacts. You can collect a long email list just by a few clicks. It sounds unbelievable, but it’s true. Let me show you how to do it.
Let’s use an automatic tool – “scrape and export your LinkedIn contacts” in Phantombuster.
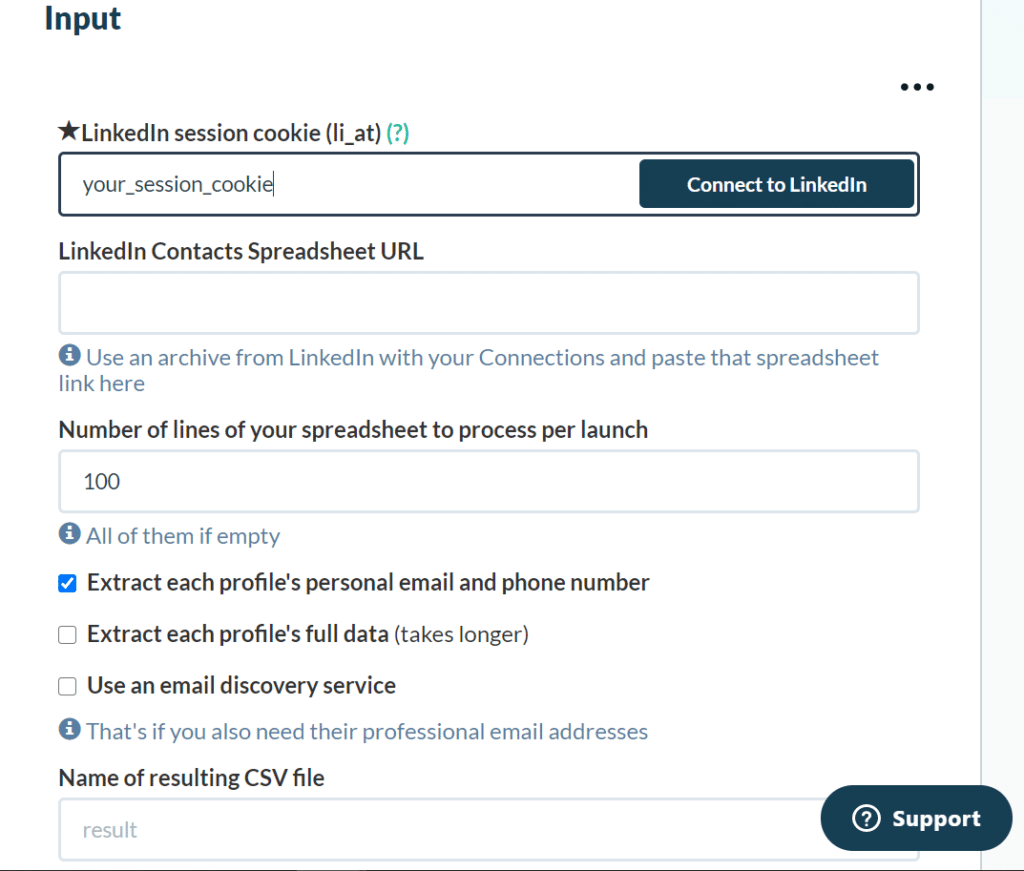
Step 1: The first thing we need to set up is the input, where we add our LinkedIn profile (click “Connect to LinkedIn” button), Spreadsheet URL, and some necessary information such as the number of lines we want Phantombuster scrapes and exports per launch. Furthermore, we can freely choose the data to scrape – phone number and emails, or full data of the contact – to meet our demands.
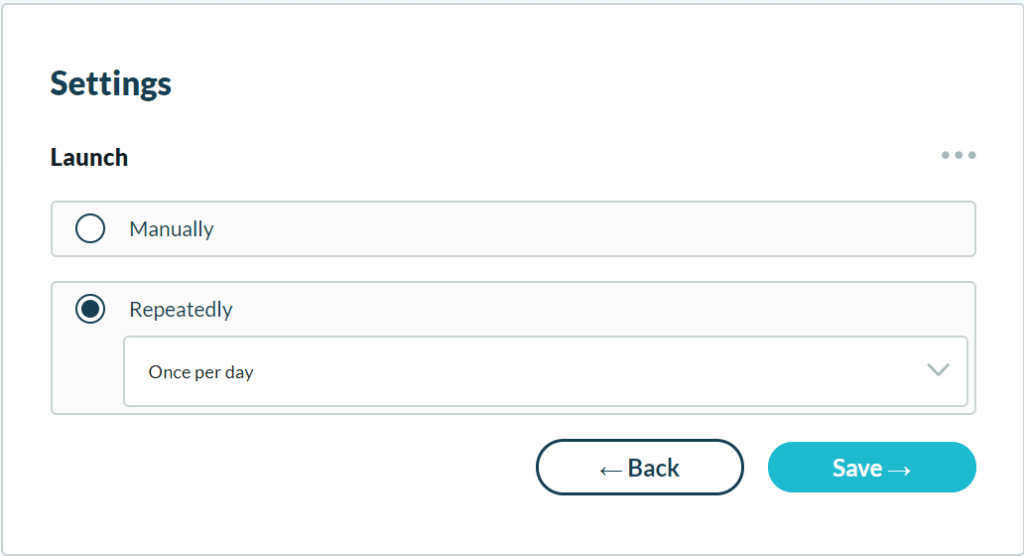
Step 2: Then, we can choose that automation repeats manually or automatically by selecting the box that you want.
In the “Repeatedly” option, there are many choices for users like once per day, twice per day, thrice per day, twice per working hour, etc.
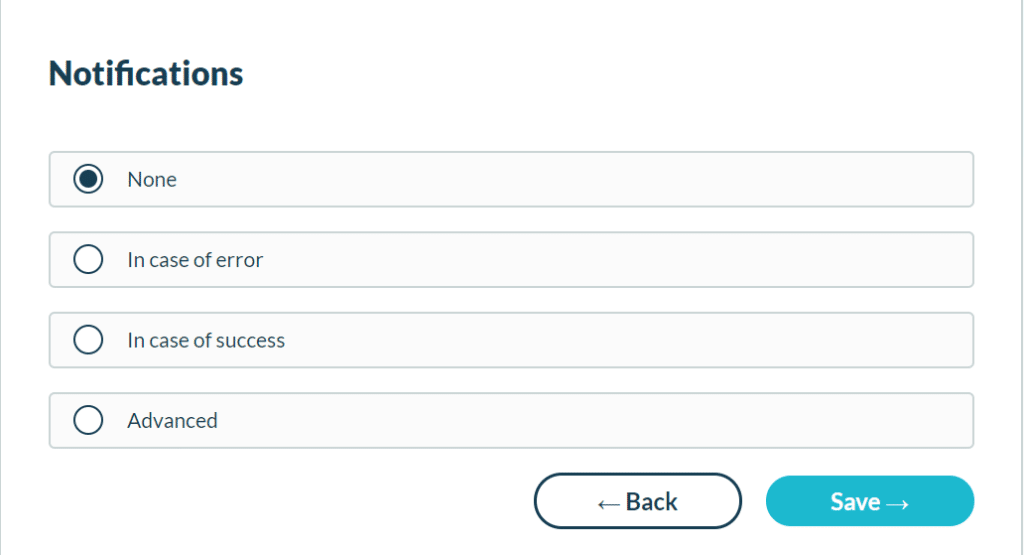
Step 3: Phantombuster also has the function to announce to you the progress of the automation that you already set up.
In case you haven’t had an enormous contact list on your LinkedIn profile, you need to connect the targeted profile first. In this case, Phantombuster also helps you to increase your LinkedIn connection. You can find detailed instructions to set up this progress by blog or video.
2.2. Verify email
Verifying emails is an important step that we need to do. The reason is to ensure accuracy when you send an email to the recipient. Please remember that the more wrong email addresses you sent, the higher possibility that your email domain will be marked as spam by Google. Therefore, remember to check the recipients’ email addresses carefully before sending emails.
There are 2 ways to verify emails: Manually and Tools
- Manually:
It is the safest way, but time-consuming. We can use another email address (an unimportant one) to send the emails to these recipients. Please note that we should divide the email lists before sending them since if sending a batch that has lots of email addresses can’t be delivered, your email has a high possibility to be marked as spam.
After knowing the status of these email addresses, you can easily remove or mark them to fix later.
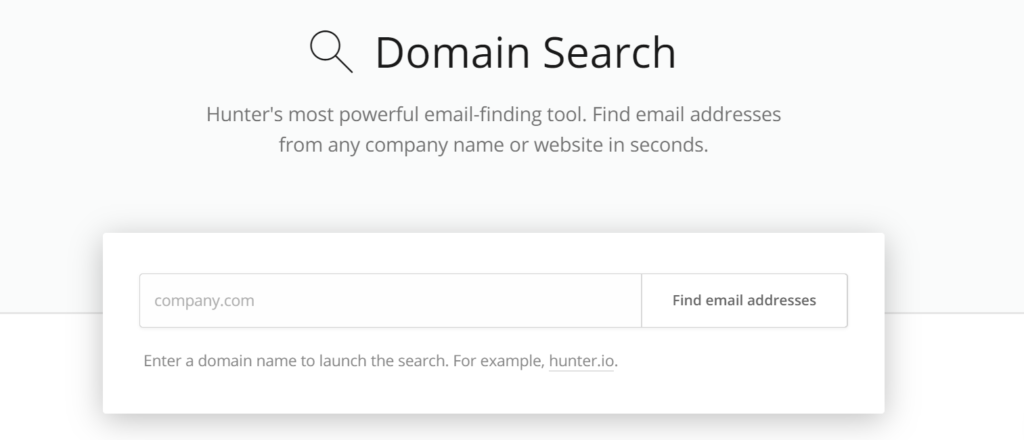
For those email addresses that can’t be delivered, you can use the tool Hunter.io to find emails and guess the domain for the person you want to see his/her email address. The free version allows you to find 50 emails per month. First and foremost, you should know the company of the recipient is working because it’s a clue to find their email addresses.
However, you should send emails found by the tool Hunter.io by using your unimportant email address to double-check.
Like we said before, it is the safest way to ensure you send it to the right email address, but it’s too time-consuming!!
- Tools: Neverbounce
You will have 1000 credits for free test, which means you can verify 1000 emails for free.
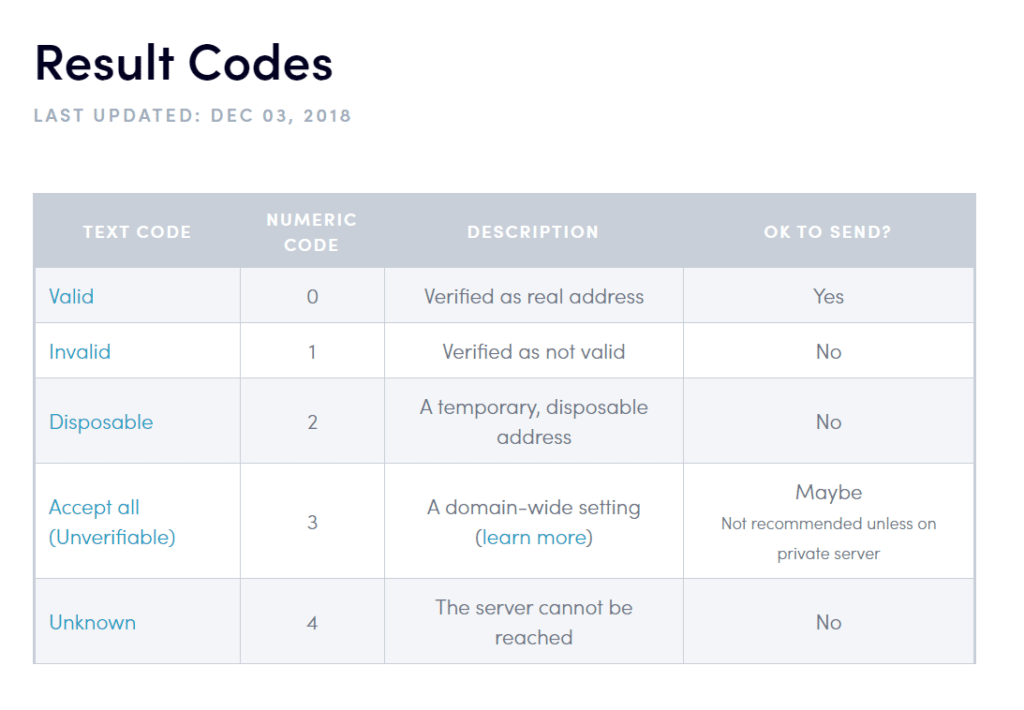
The first step you need to do is uploading your email list under the Excel CSV file. After analyzing your email list, this tool will show you the validation result: valid, accept all (unverifiable), unknown, disposal, invalid. As per Neverbounce, those email statuses illustrate:
There are 3 options for the user to download the validation result: deliverable, undeliverable, all results. Depending on your purpose, you can choose the suitable options to download.
The result’s accuracy from Neverbounce isn’t 100%, but we personally evaluate approximately 98-99%.
2.3. Store your data by using Excel
It is crucial to store all your emails, name, company, title, etc. of all recipients in one master list. We recommend using Excel to keep this work because Excel can store massive data.
During the time you work, you need to contact lots of people, you need to run a ton of campaigns, so if you don’t store any contacts, it’ll be complicated for you later. The reason is we need to verify whether we already contact that recipient or which campaign that recipients belong to. Besides, it’s easy to remove duplicates in one Excel sheet. For the “remove duplicates” section, we will present it in detail.
Some Customer Relationship Management (CRM) tools that we can use to store your contacts are Hubspot and Agile CRM. You can effortlessly set tags for your contacts, keep your contact information (name, email, phone number, etc.); however, you can’t know the duplicates if you store your contacts in different campaign lists. Therefore, using Excel is optimal to filter, sort, and remove duplicates.
2.4. Remove duplicates
When you run several campaigns, and in each campaign, you collect an email list from lots of resources. So how can you know that the list you recently compiled doesn’t contain any duplicates email in your master list?
Don’t worry! We will show you the way to tackle that problem.
Let’s try Kutools– the plugin tools for Excel, which you can easily remove your duplicates.
Step 1: After downloading Kutools, open your Excel sheet and find the “Kutools” in your navigation bar.
Step 2: Choose Select – Select duplicates and unique cells.
Step 3: Choose the row that you want to remove duplicates. We usually select the row “email address.” Select duplicates (except 1st one) or all duplicates (including 1st one) to match your purpose. Then click “OK.”
Step 4: Kutools will show you how many duplicates in your Excel sheet. After that, just by clicking the “Delete” on your keyboard, the duplicates will disappear.
Step 5: Filter the “blanks” and then delete it.
Why do we recommend using Kutools?
On Google Spreadsheet, we have the function to find and remove duplicates. However, if we use that function, it automatically eliminates the email addresses (if we choose the row “email address” to remove duplicates), but it doesn’t delete the rest of that contact information (name, company, etc.) Hence, your sheet is not correct any longer.
2.5 How to write an excellent cold email
Contacting someone for the first time via email, we need to organize the texts carefully. It is a first impression of the receiver towards you, and that first impression decides mostly the chance they get back to you.
Hence, preparing discreetly the email content is worthy of doing.
You can consider these valuable points:
Have a clear insight into your recipients:
First and foremost, knowing the profiles and demands of your recipient can increase the opportunity to have a closer step to them.
For each targeted receiver, we have different email contents. For example, when you send cold emails with the purpose of selling, you need to focus on explaining clearly and briefly the benefits of your products that can be offered to your buyers. If you send emails to collaborate with other organizations, you should introduce yourself concisely and convey the mutual benefits and meaning between you and your partner.
Everyone frequently scrutinizes the offers if you show them why they should choose you and what they receive benefits from you.
Make sure that your email contents are relevant and valuable to your recipients. It’s one of the differences between cold email and spam email – send the same content to everyone regardless of the relevance and demands of the receiver.
Use the real name and insert the contact information in a signature area
If you don’t want to send a spam email, please use your real name. It is one way that can increase the chance the recipient opens your email.
Spam emails usually don’t have any contact information. To make your company/organization more reliable, remember to insert the personal and general information such as job title, website, phone number, social media channels, and so on.
Use the first name of targeted recipient:
When we contact someone for the first time, we can catch their interest and impress them by calling their names. That way may also create a tight connection between you and your recipient.
There are some tools to set up email automation and using some terms such as Hi {FirstName}.
Thus, don’t have a headache that you will send an email with a different first name’s recipient manually😊 You can actually do it automatically, we will give you a detailed instruction below.
Introduce yourself apparently and concisely:
It is crucial to introduce yourself, your company/organization, to give the receiver clear and brief information about whom they are contacting.
However, remember to keep it short and sufficient.
Check our copywriting guide to help you write cold emails.
2.6 Set up email campaign automation
Sending emails manually with a long list of recipients is not a smart way since it consumes a lot of our time. Therefore, using tools to send emails and track emails automatically is more convenient.
We will show you a step-by-step guide to create email workflows and email campaign optimization by using automatic tools.
- Send emails automatically:
There are several tools for sending emails automatically, Some good mentions are GMass (a plugin in Gmail), Hubspot CRM, Mailshake and Reply.io. We recommend you use Reply.io because it has an easy and straightforward platform to use, and it keeps track of all the email status automatically for you. It offers a 14-day-trial to use its tool.
Let me show you the consecutive steps to use Reply.io as an automatic tool to send emails.
Step 1: Sign up
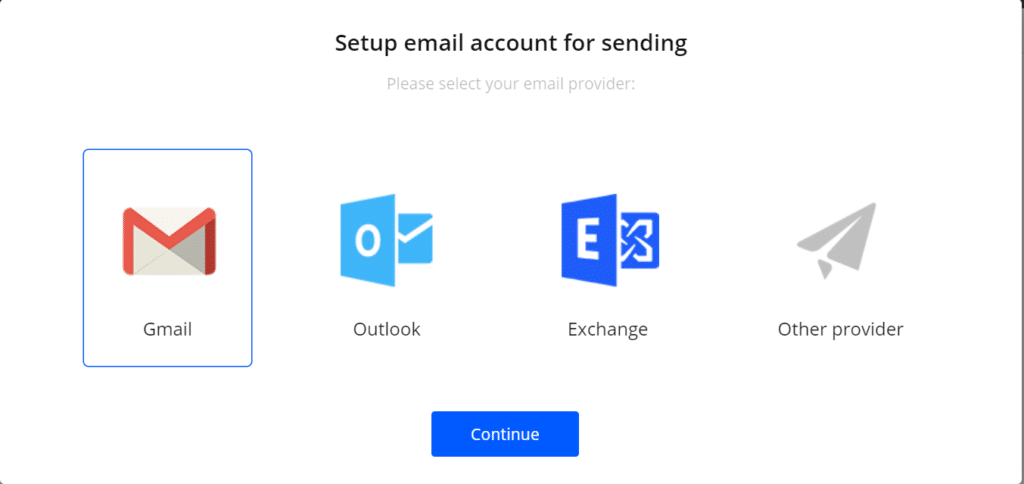
The first thing is creating an account. Then, Reply.io will ask you to choose the platform to send emails. After selecting the suitable one, you press “Continue.”
And then, choose an email address and your display name when you send emails to recipients.
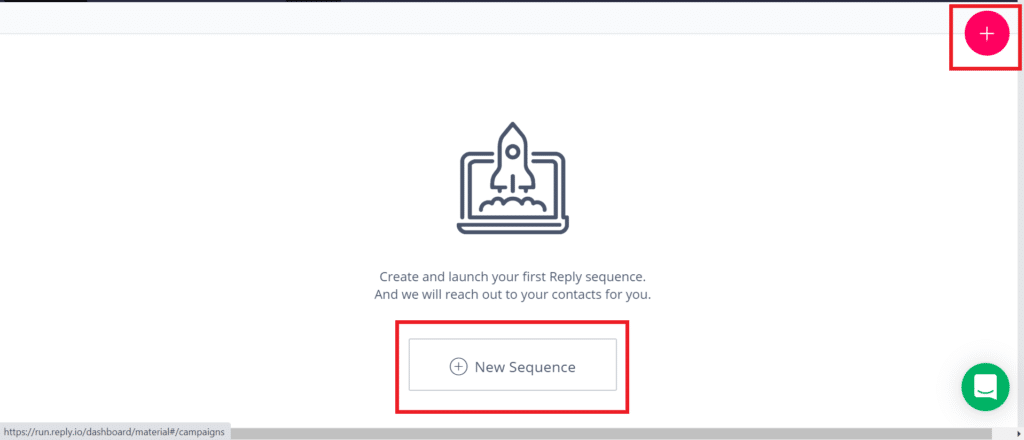
To create a campaign, you can click the pink button in the upright corner or select the new sequence.
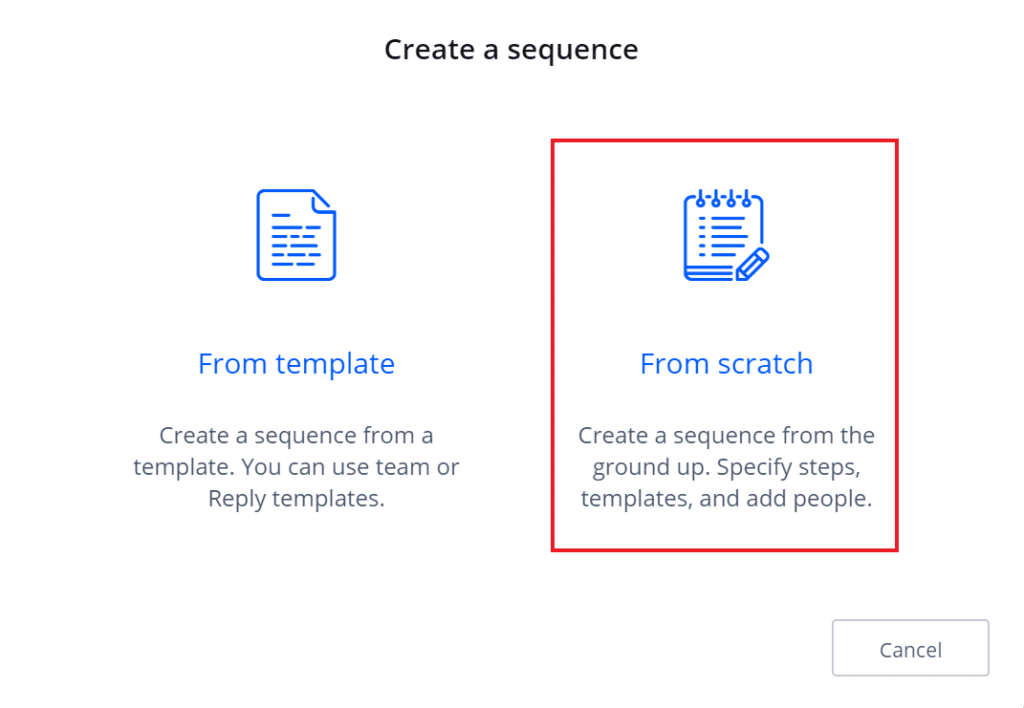
Then, you choose “From scratch.”
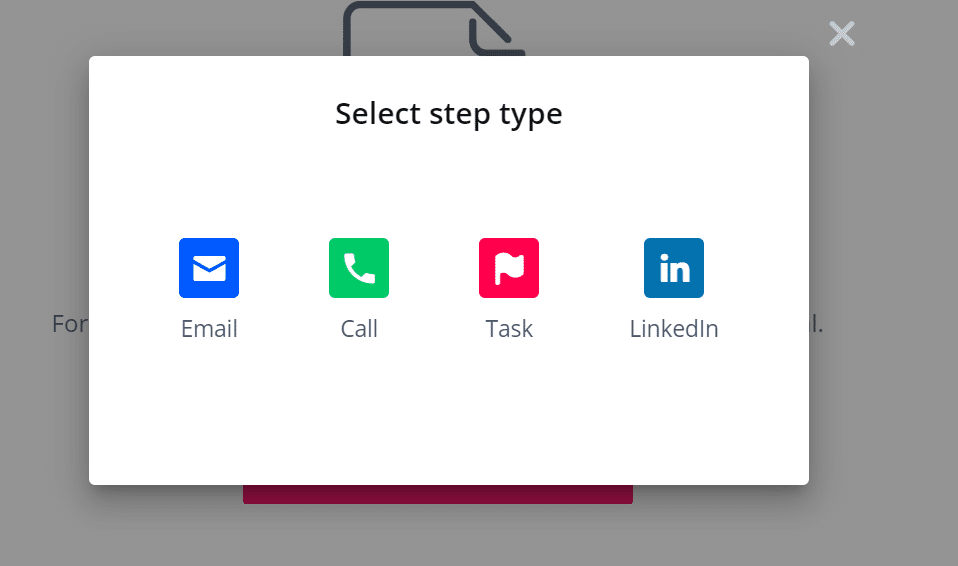
Next, you select “Add Sequence Step” to set up the sending email process and choose email.
Step 2: Write email content:
I’ve already shown you some valuable ideas about good email content above. We separate the email script and email content in this sector because we don’t want to make this guide of setting up automation long and hard to read.
Thus, prepare the email script before and check it carefully before setting up automation. Let’s divide your work and conduct it discreetly at each step. It can help you organize your task better.
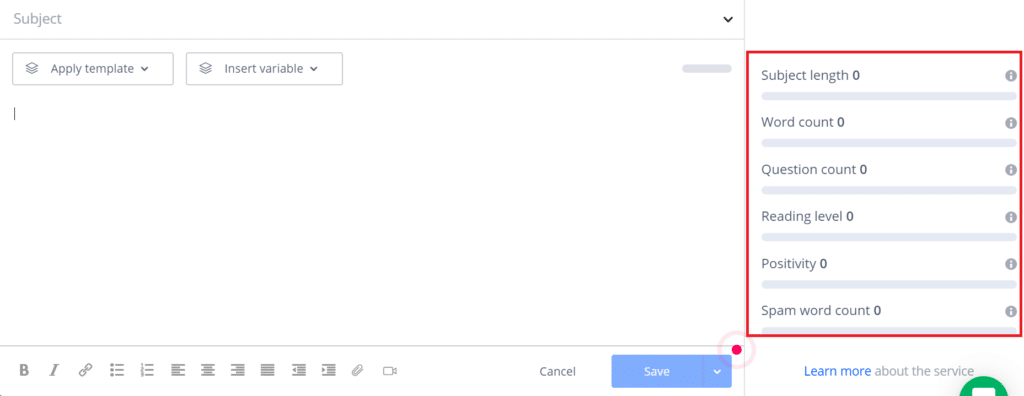
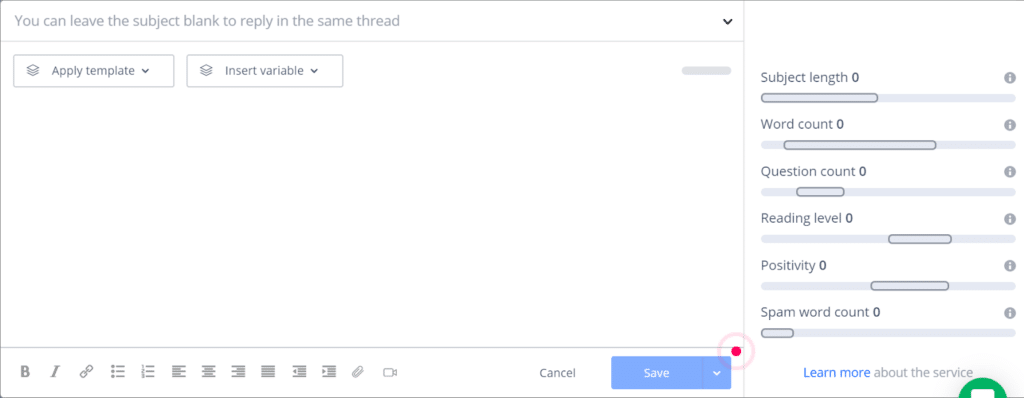
Additionally, in Reply.io, there is a brief analysis of your email script.
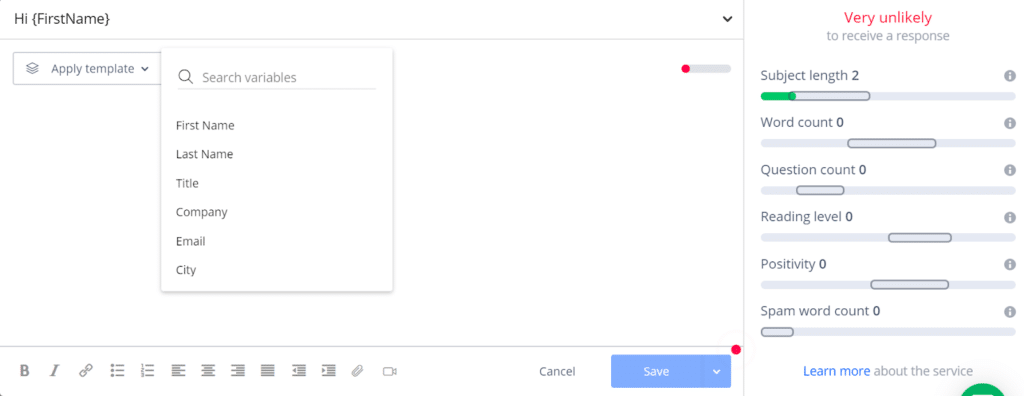
Furthermore, you can insert {First Name}, {Company} in the box “Insert variable”
For example, if you write Hi {FirstName}, your email will be sent with the first name of the recipient. That first name is imported when you upload the CSV file to Reply.io. Therefore, please ensure that the contact list you uploaded in Reply.io is correct.
After writing the subject and contents in your email, you press “Save.”
To set up a follow-up email, select the email icon (see the picture below).
At this step, remember NOT to write any texts in the subject line if you want this email is a follow-up email of the previous email.
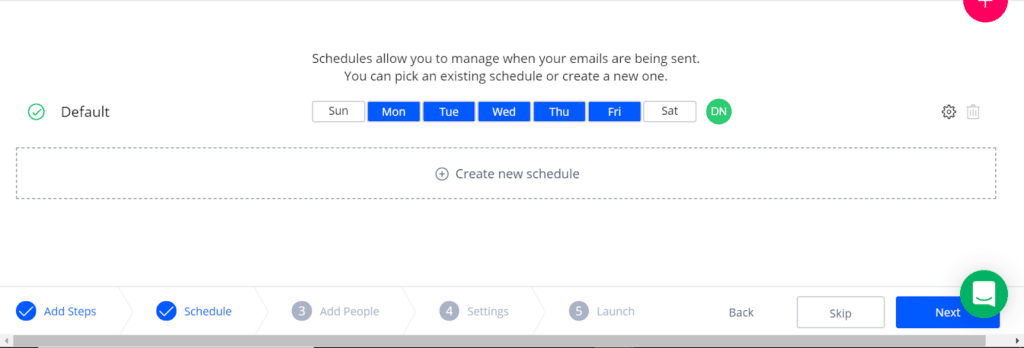
Step 4: Schedule and add contacts:
You can choose the time and date to send emails to your recipients.
And add your contacts in your campaign.
Step 5: Establish some basic settings and launch the campaign:
The users can find some necessary information such as how many emails will be sent per day, how many seconds delay between each email sent, etc. Read the information of the limited emails per day in G Suite and Gmail before setting up the number of emails sent by Reply.io.
Subsequently, you set up all the pertinent information for your campaign and launch it.
It’s done!
- Keep track the email campaign progress:
Although Reply.io shows you all the information about the status of the contacts; however, you can’t see these contacts any longer when the free trial expires. Therefore, we recommend you keep track of your contacts automatically in the Google Spreadsheet. We personally think checking all information in one platform in a Spreadsheet is more convenient because we can freely filter or highlight any information.
Thus, in this section, we will show you the tool – Zapier – to keep track of your contacts automatically.
- Update Google Spreadsheet row when someone replies email
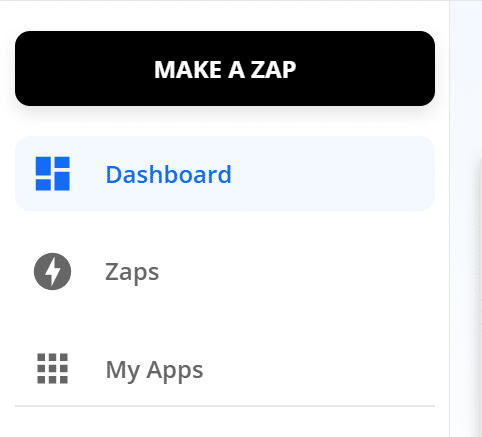
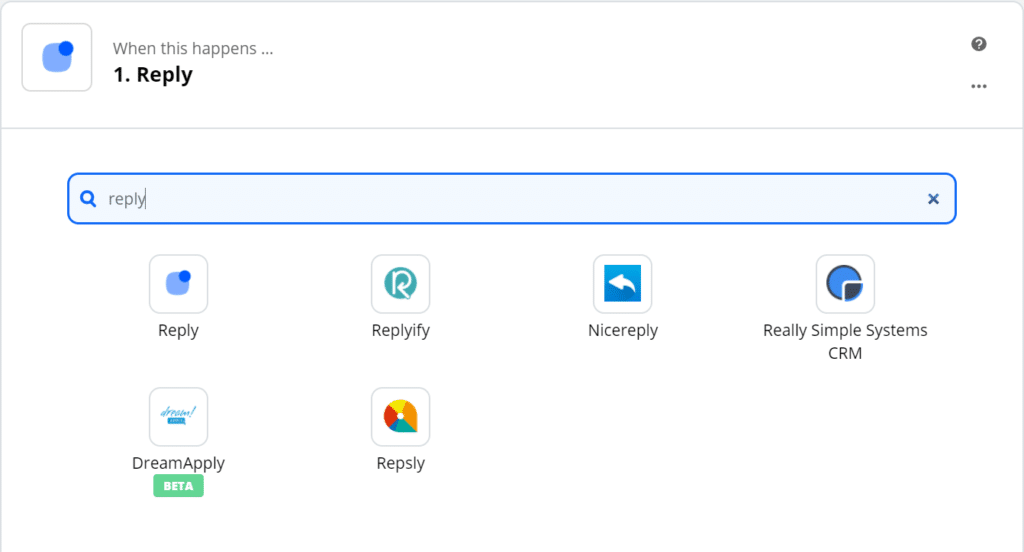
Step 1: Press “Make a zap” in the navigation bar on the left of the screen and type “Reply.”
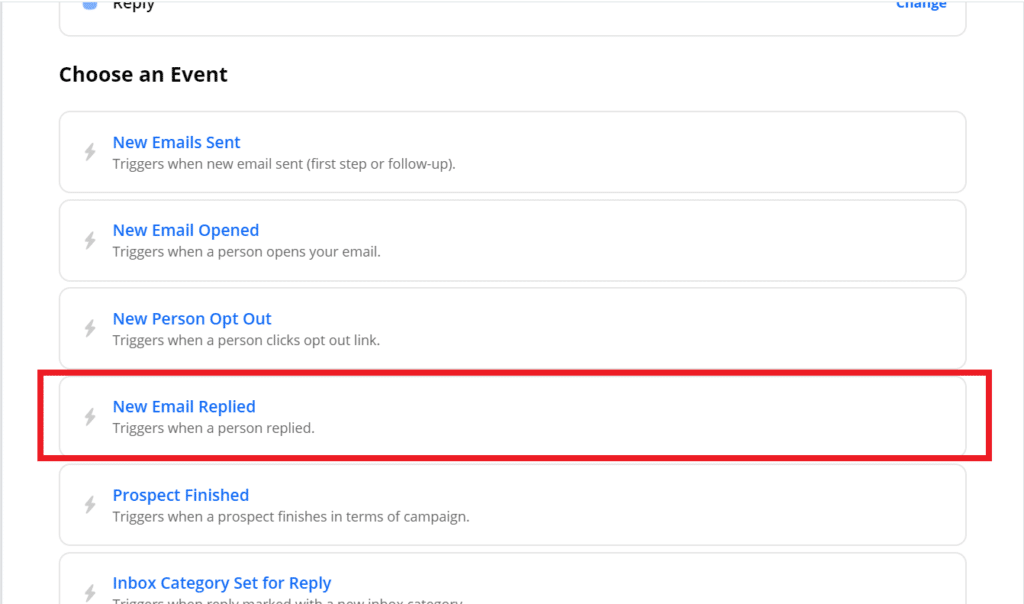
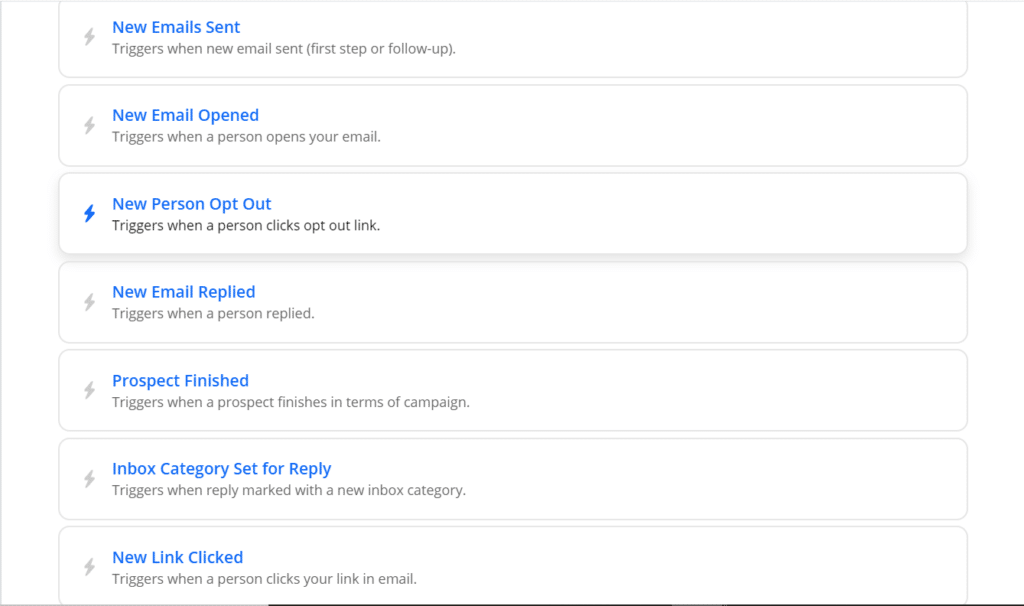
Step 2: After clicking the Reply, you choose a suitable event to trigger. Because we’re going to update the Google Spreadsheet when someone replies to an email, so we choose the event “New emails replied.”
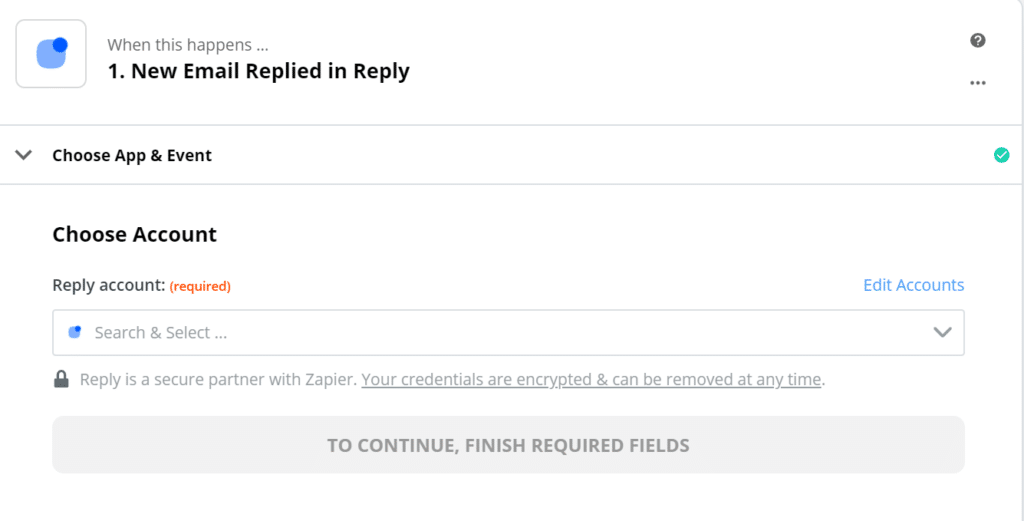
Step 3: After choosing the event, you need to select the account.
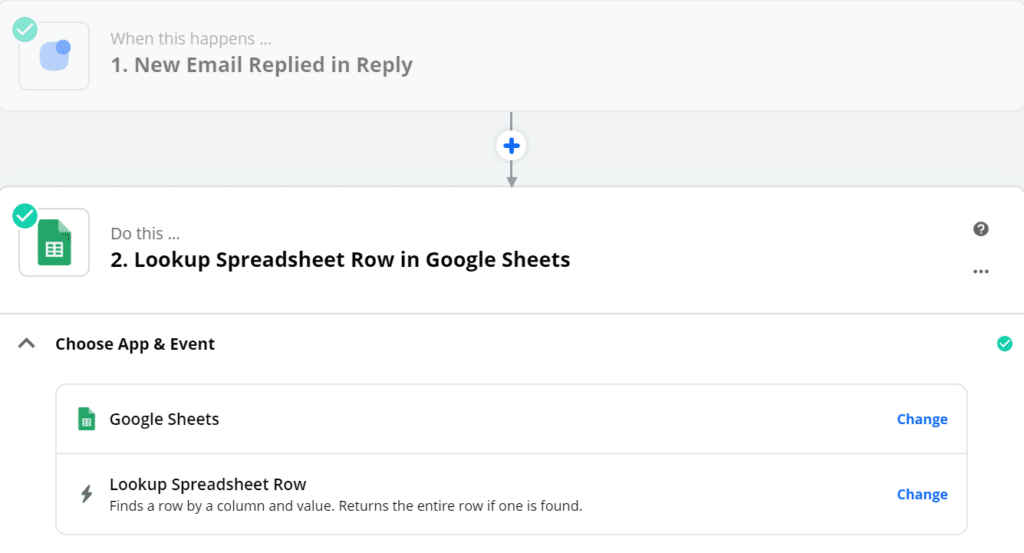
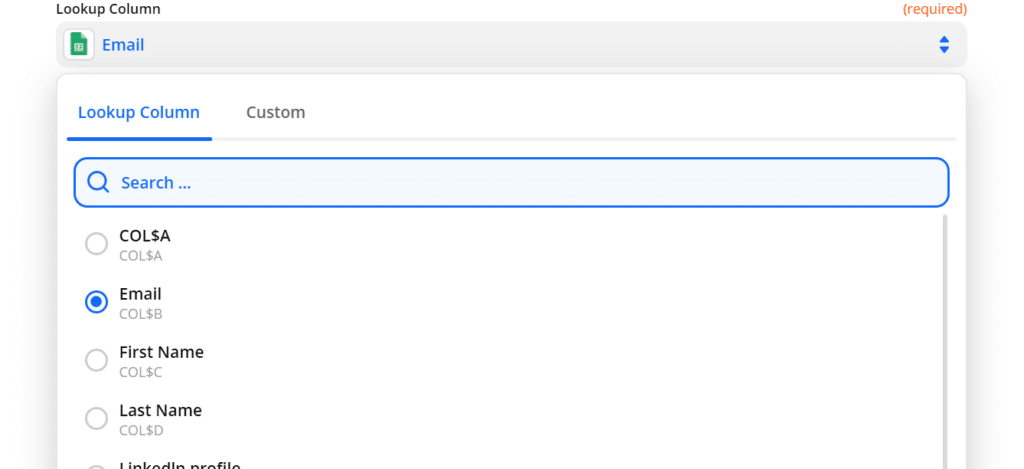
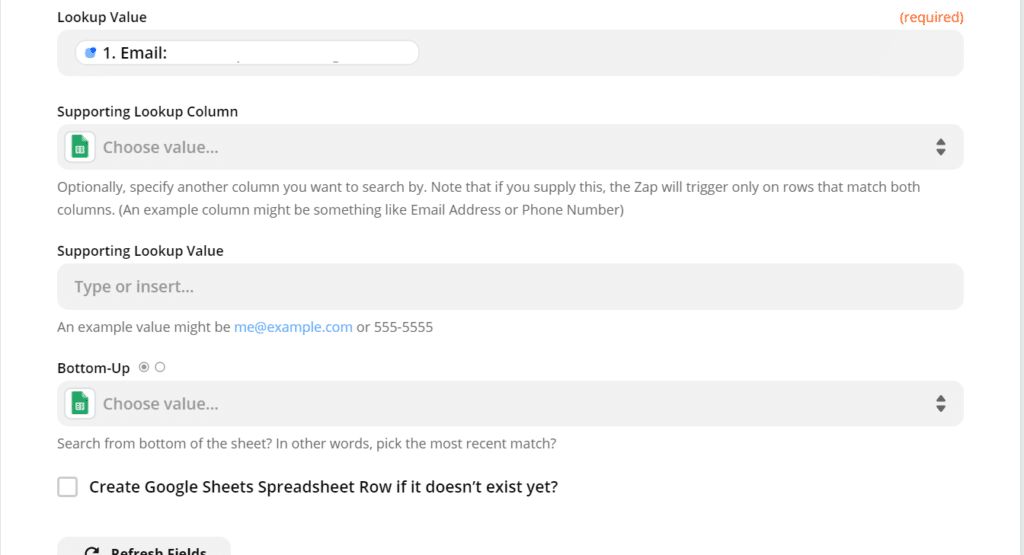
Step 4: We need to set up a step “lookup spreadsheet row in Google Spreadsheets” to activate Zapier to find the right value in the Spreadsheet so that it can automatically update the Spreadsheet when someone replies to your email.
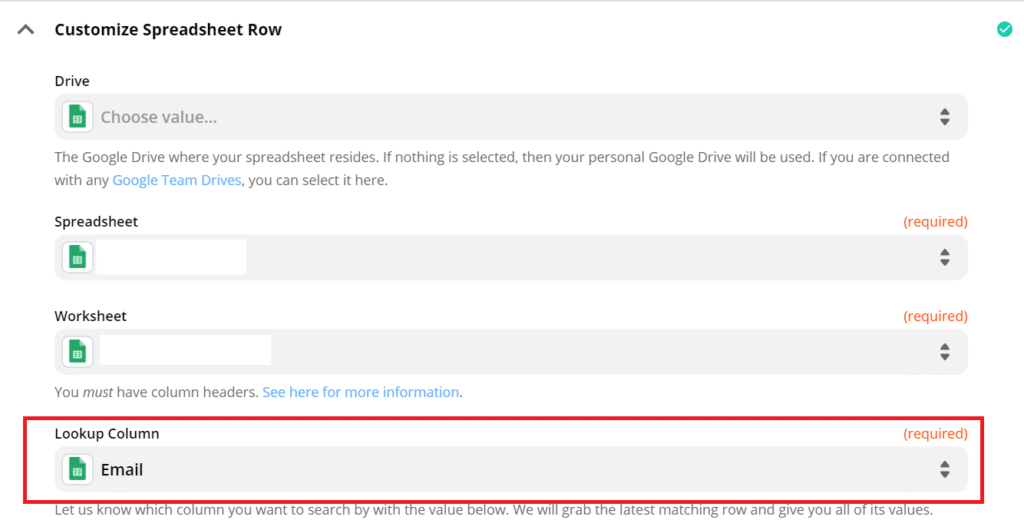
Next, choose your account and customize your spreadsheet row. All you need to do is choose the right Spreadsheet and worksheet. Don’t forget to select “Email” in the Lookup Column so that Zapier will find the same email and keep track of it.
After that, you can test and review in the “Send data” section.
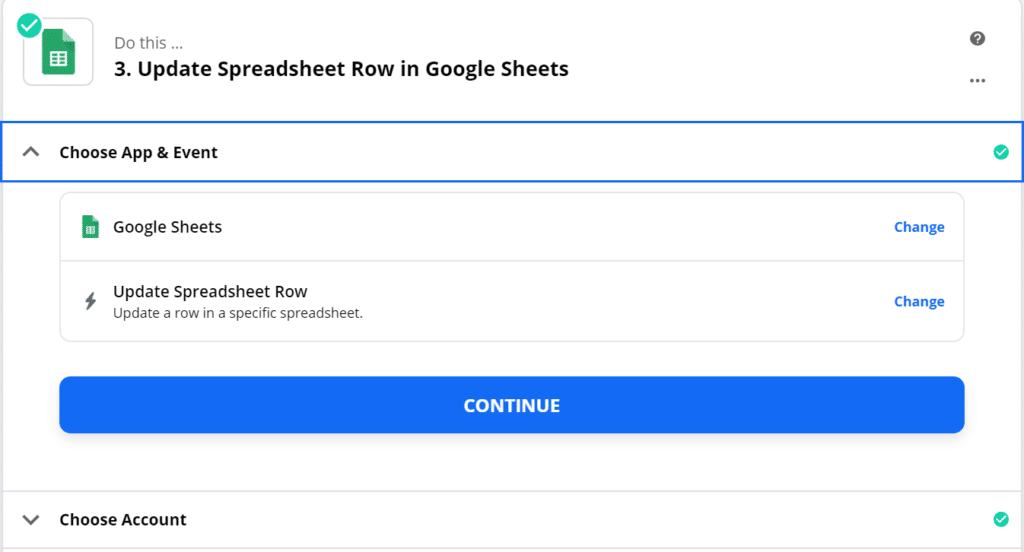
Step 3: Update Spreadsheet row in Google Sheets
Similar to the previous step, you need to choose the event to trigger and select the account.
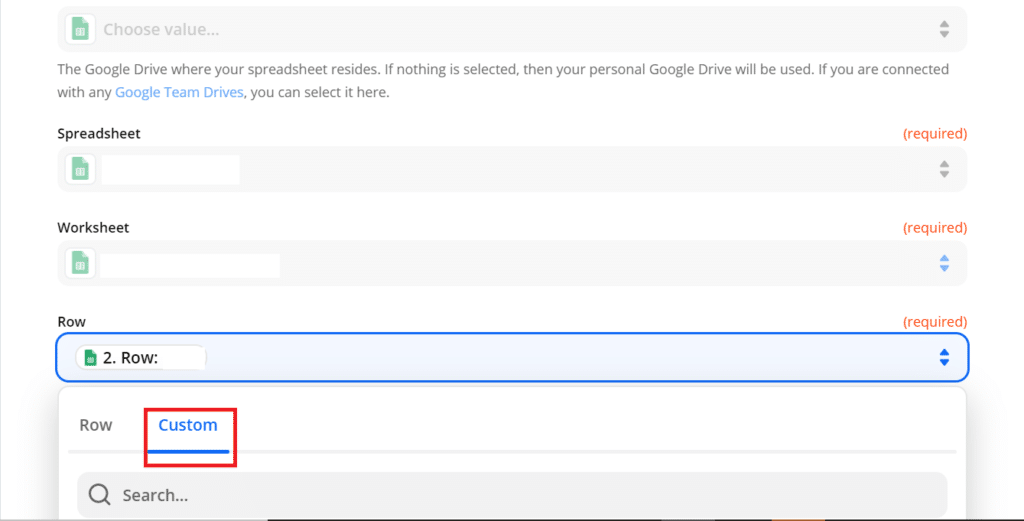
In the “Customize Spreadsheet Row” section, you choose the same Spreadsheet and worksheet as in the “Lookup Spreadsheet Row in Google Sheets.”
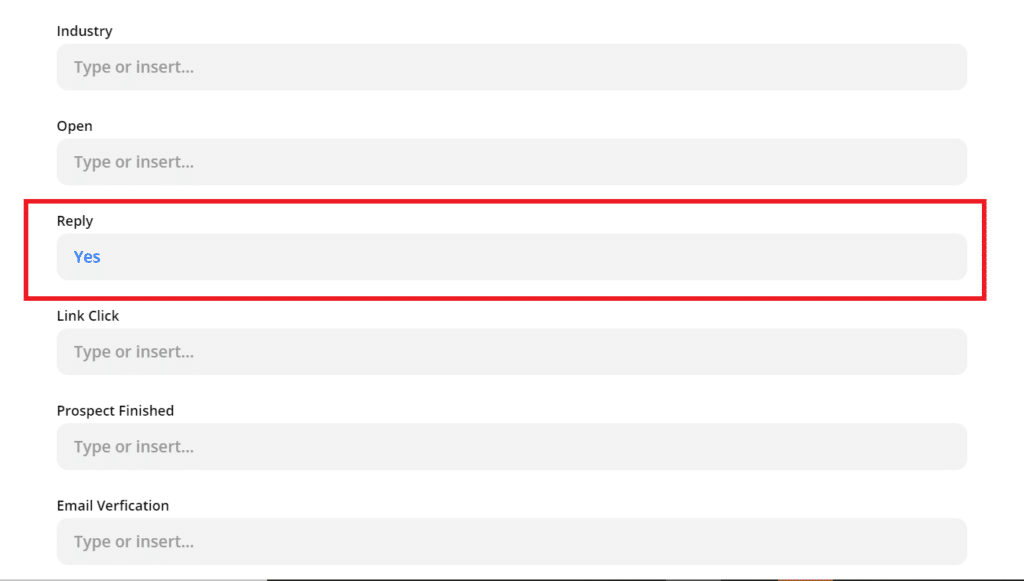
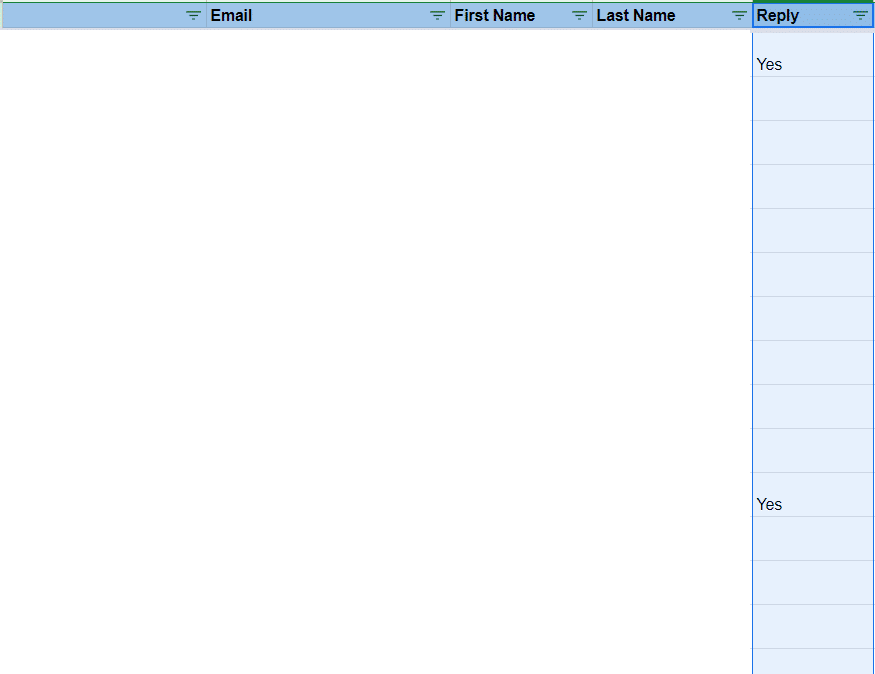
And you don’t need to write anything for the rest, excluding the row “reply” since we want the Spreadsheet to appear the word “yes” in the column “Reply.” When someone replies to your email, Zapier will automatically write “Yes” in the column “Reply” for you (see the photos below).
If you make another zap and want Zapier to write “yes” when someone opens your email, you need to write “yes” in the column “Open.” In short, when you want Zapier to write “yes” in a specific column automatically, you need to write “Yes” in that same row in the zap, so that Zapier will trigger and automatically report the same thing you wrote.
Your Spreadsheet will look like this (we already covered the information of the contacts in our Spreadsheet)
We have just shown you how to set up automation in Zapier.
Of course, you can make another zap to keep track of the events that you want.
These are some events in Zapier that may fit your interest (see the picture below).
3.Conclusion
Finally, we have just gone through a step-by-step guide for a cold email campaign.
It may be difficult for the first time that we set up all the processes before and after sending emails but don’t worry because you will get used to it! After knowing and setting up that automation, everything will be right on track, and you can save your time a lot.
We hope our guide is useful, and it can contribute to your cold email campaign. Follow Sisu Digital for more lead generation guides, marketing news, and business trends.
Sisu Digital is a growth marketing agency devoted to empowering international startups and SMEs to grow and get high-quality leads with world-class digital marketing solutions. Our services are Web design, Website Maintenance, B2B Lead Generation, Linkedin Personal Branding.
